Girafarig was a commission painted on a postcard sized paper. While it was challenging to work on such small space, it had the benefit of minimized transportation damage. Luckily it came through without a single bent. While I was at it, I made a custom carddass as well. While the fonts are not exactly the same, I think they’re close enough to the original.


31 Likes
That looks amazing! I like that the tail has personality showing, very much like actual carddass cards which show a lot of attitudes of pokemon.
Going to need to message you for a few johto commissions if you are this good at getting them right ![]()
13 Likes
I have to tag @johtogiraffe to look because of obvious reasons.
10 Likes
I’ve been on a bit of a kick wanting to design some Pokémon cards. I unintentionally recreated the Stormfront artwork (there’s not much posing you can do with Drifloon lol)

26 Likes
LETS GOOOOOO HES GONNA GET STRUCK BY LIGHTNING!!!
13 Likes
If I were a half decent artist, I’d do something a little more sinister around their lore of floating kids off. An idea that could be cool is an art where drifloon have wrapped their tendrils(for that is what they are) around a bunch of baby pokemon and are starting to float away. Azuril in a panic, upside down, held by its tail. Smoochum and togepi flailing their little stubby nub limbs and crying. But some can and are fighting back. Elekid can be seen with a determined look, spinning its arms getting charged up to shock the dastardly balloon who had the gall and misfortune to pick him up. Then you have a humorous one. Bonsly just sitting there with a big dumb smile, as his drifloon is wrapped around him tight, but is straining to no avail, as bonsly is just an actual giant rock. It cannot be picked up.
But anywho, I picked up the actual card you are making a new art for recently. I always liked drifloon as soon as I first learned about it showing up at valley windworks in Sinnoh on fridays. Thanks for sharing. Also it has a very satisfyingly different shiny form. I like when shinies are actually very distinctly different.
11 Likes
@biirdbots I agree that the posabilty of Drifloon is limited in a way, but I think the pose works great for your custom card.
Speaking of customs cards, here are a few more carddass from a while ago.


21 Likes
Golduck is brutal but they all go well with the original set. Nice work!
16 Likes
All of these look perfect for the cardass set! Especially the Golduck and Dragonair, as they follow the “metal” theme of some of the cards. Very happy to see you have lots to share ![]()
15 Likes

@paper that is cool. Did you draw this with pen.
8 Likes
Thanks! I drew it digitally
8 Likes
Hi all,
Not sure if this qualifies for this thread but I really enjoy reading peoples write ups on how they make their art and crafts so figured I would share this card case I made for my Secret Santa recipient this year.
Warning: My intent was to keep the write up on the process as ‘matter of fact’ as possible but I tend to ramble on a lot so sorry for that. Hopefully some of the info is helpful to someone if they are interested in CAD design or 3D printing.

Overview
I’m not an artistic person, I can’t even draw a straight line for that matter, but I’m relatively versed in mechanical design and love the process of tailoring a gift to a recipient.
I participated in the 2023 SS and had a ton of fun making a card case for my recipient, so I wanted to continue that tradition this year.
Initially, my thought was to repurpose most of the 2023 assets and modify them for this year’s recipient, but I quickly realized that wouldn’t be possible.
Last year I used whatever I had on hand and designed around it. A couple random hinges I found in my basement, a handful of brass M2 standoffs from my workbench, a miss-match of loose fasteners and one googly eye I purchased from a craft shop. None of which I have anymore.
Clean slate build it is…but for this years’ design I wanted to use as few off the shelf parts as possible.
It started with picking the card. Based on my recipients tastes I chose a Japanese Sabrina’s Gengar holo.
Everyone knows that the Japanese variant has a graveyard in the background whereas the English version doesn’t, so that’s what I decided the theme of the case would center around. But before I could get started on the “artistic” aspects of the case, I needed to iron out the “mechanical” components.
Mechanical
The first of which was how I would retain the slab. In 2023 I simply designed a “shroud” with “retention” tabs that screw into brass inserts to hold the slab in place. Although it’s a simple and secure approach to retention, the drawback is that the recipient needs an appropriately sized bit to remove the card from the case. This was a bit of an oversight in last year’s design, and I didn’t realize it until I was packaging the gift. My only solution at that point was to simply ship the bit with the card.
This year I settled on an even more simple (but far more time consuming) form of retention. A light friction fit. Just enough friction to hold the slab securely in the case while being still being able to remove it with a firm press of the finger.
The process is very straightforward. Choose the material you want to use, take calipers to the slab, draw it in CAD, print it, test it, repeat until you feel comfortable with the results.
For the material I chose 98A shore durometer TPU (Thermoplastic Polyurethane) because it’s malleable enough to conform to shapes yet rigid enough to retain a structure.
It is essentially a bridge between plastic and rubber so unless you have a saw or a torch, you can’t break it. It does however have a couple drawbacks.
- You must print it slow to avoid clogs (imagine pushing a spaghetti through a tube)
- Although it has excellent mechanical properties, it’s not the most aesthetically pleasing material
To remove the slab, you simply push on the Pokeball on the back of the card and it pops out. At this point in the process, I didn’t have my recipients’ card in hand, so I designed around an English card. Turns out the Pokeball on English and Japanese cards isn’t centered the same. So once the card arrived, I had to redesign the holder (OCD).

Next is designing the hinges. This was straightforward. Design, print, add a M3 machine screw and Nyloc nut. Bob’s your uncle. My biggest mistake was designing these at the beginning of the process instead of the end…(foreshadowing)

Lastly, is the clasp. For this I used my tried-and-true method of good ole refrigerator magnets. As mentioned, TPU is flexible and can conform to objects, so magnet retention is achieved by printing a slightly undersized pocket for the magnet with a chamfer, putting a dab of superglue on it and throwing it on the bearing press.

I like this approach because it’s simple and gives a nice tactile thud when you close the case.
Once you set the magnets there is no removing them, so you MUST make sure you the polarity is correct before setting the magnets. This may sound like a no brainer but when working late into the night mistakes happen. Unless you want a case that cannot be closed, the only choice is to remake the entire part. Ask me how I know…

Artsy Stuff
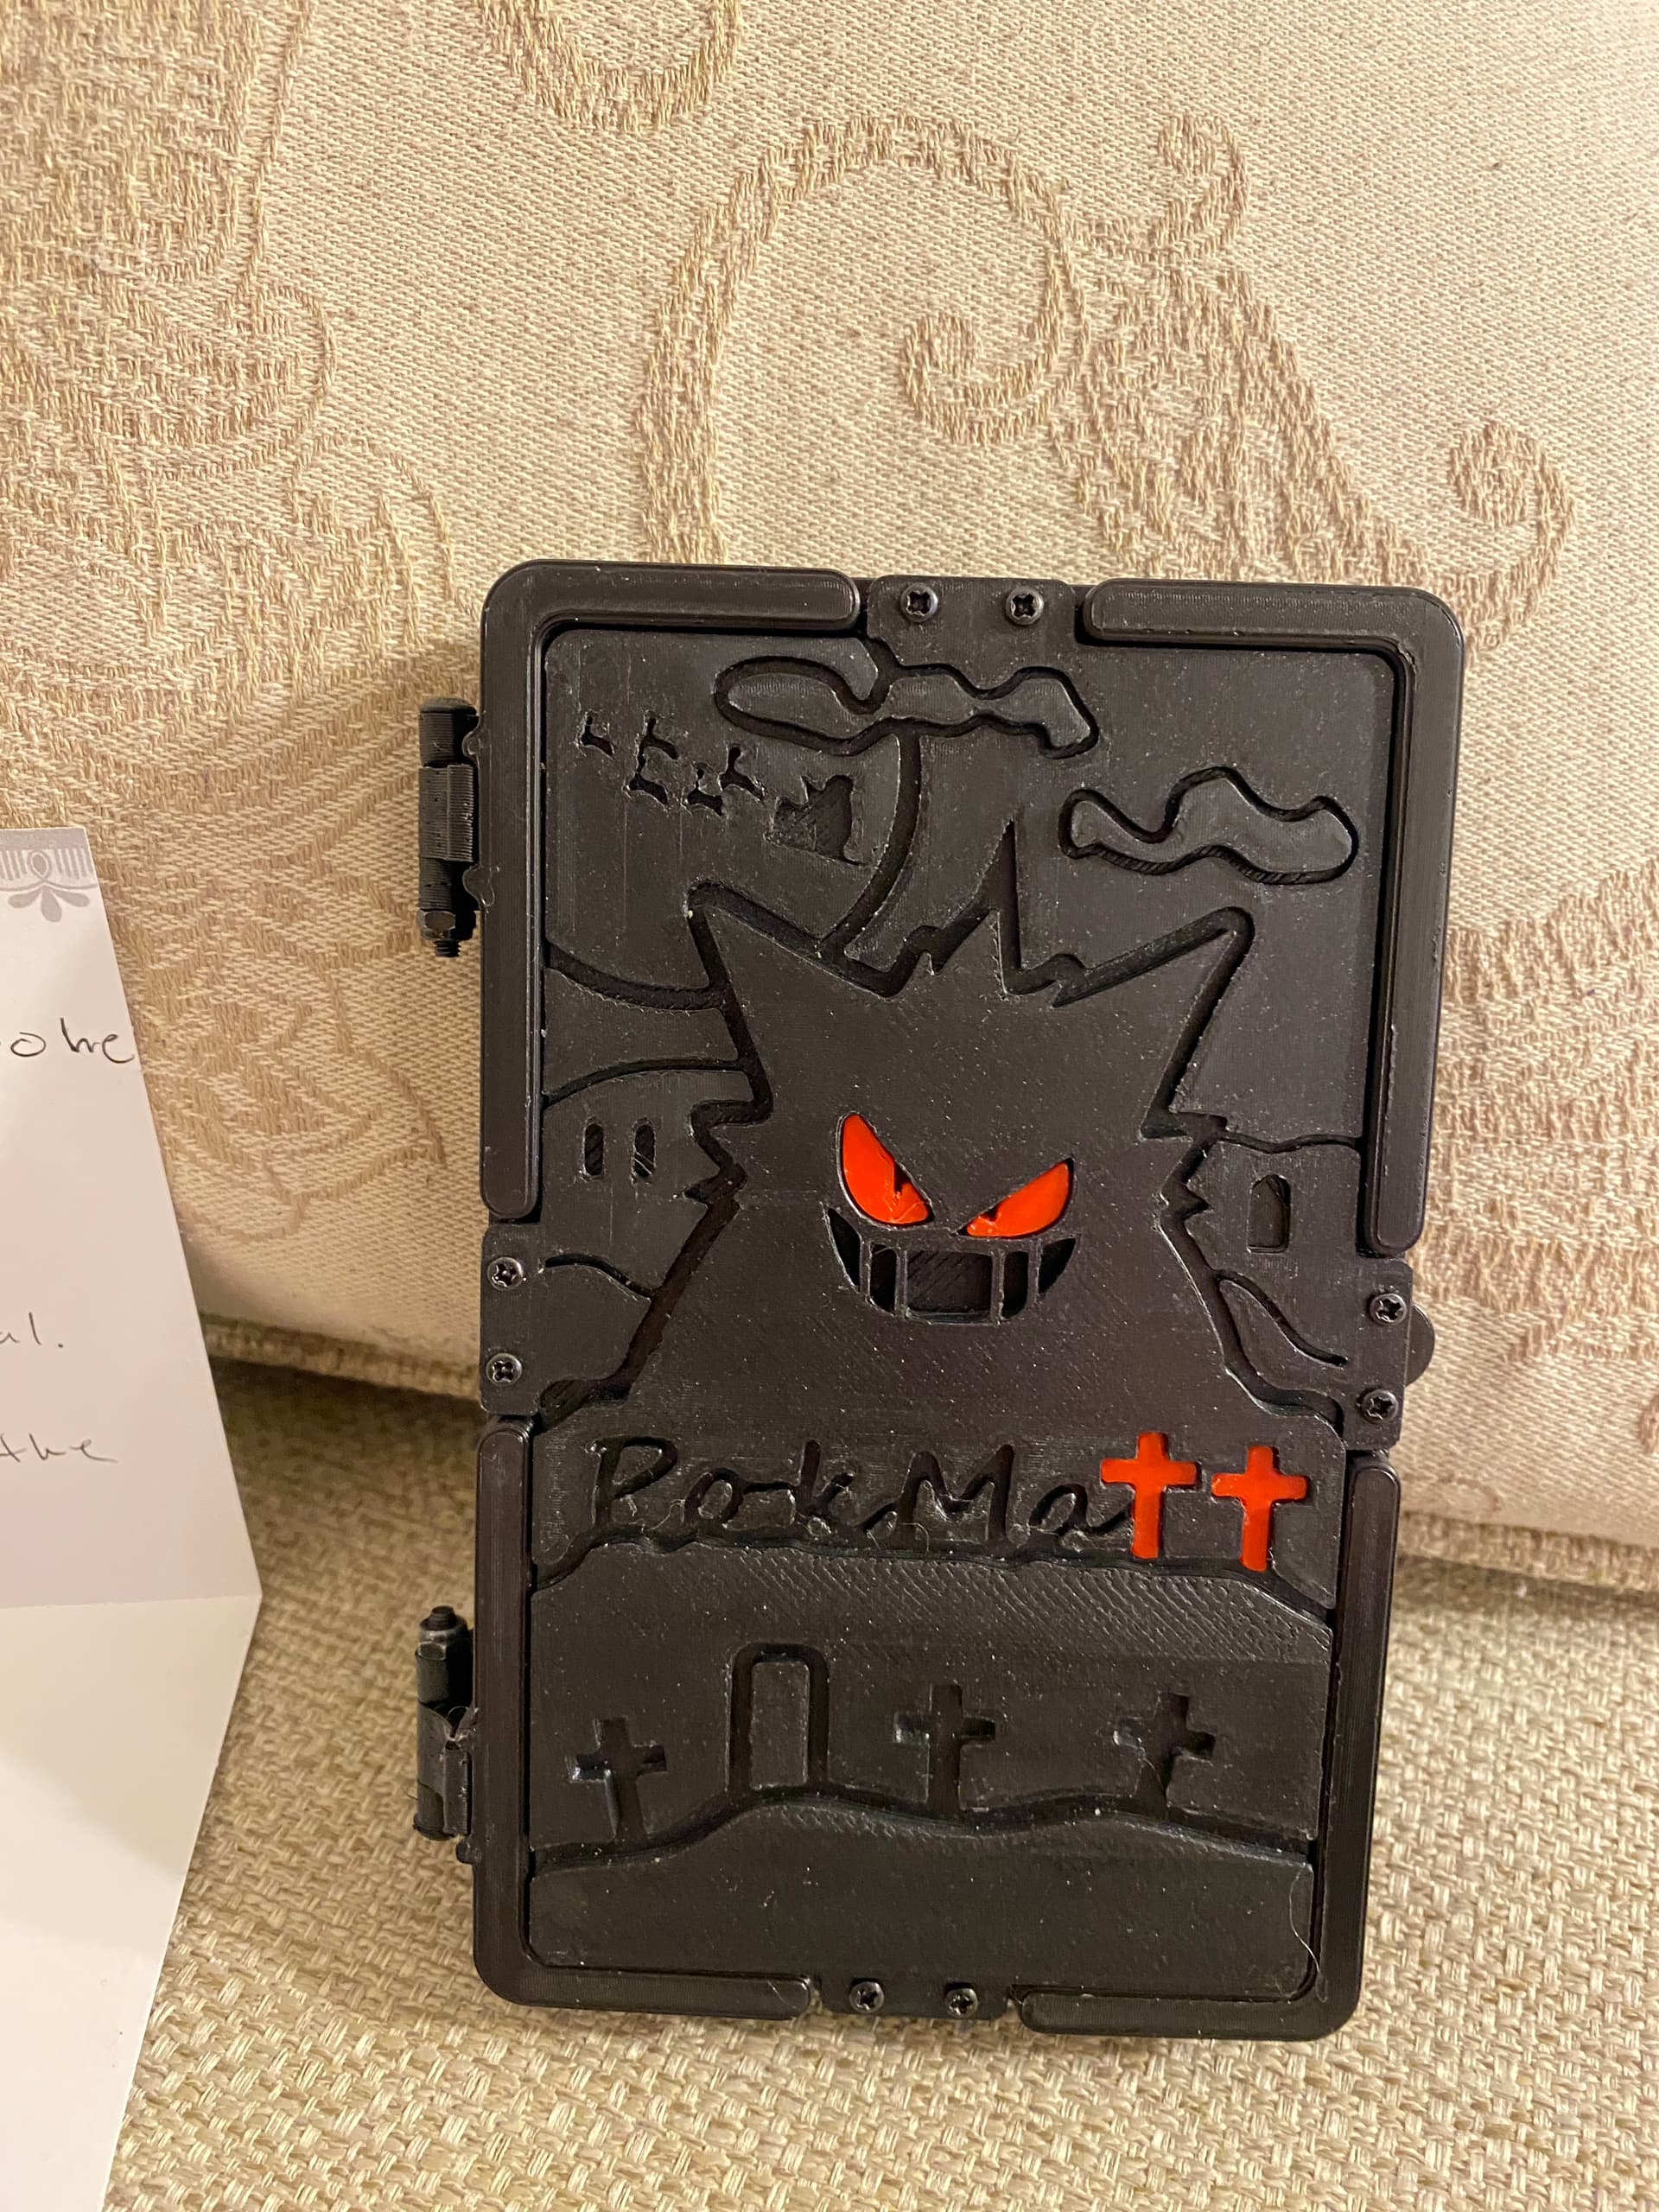
For the case cover I knew the theme was going to be centered around the graveyard as it’s unique to the Japanese variant of the card, but I didn’t really know where to start.
I started by canvasing an image of Sabrina’s Gengar from gym challenge and went from there. Canvasing is simply uploading an image to the CAD program to use it as reference for a drawing.

I then had the idea of making it look like Gengar was rising out of the grave and had an “aha” moment when I realized I could use the two “t’s” in my recipient’s username as crosses. From there the graveyard theme really started coming together. Although consistent with the theme of the card, at some point I realized it wasn’t very “festive” so I added Santa and the reindeer lol.


I wanted to give the cover texture (kinda like an ALT art) so I extruded the features at varying heights to add depth. My machines can only print one color at a time so the red features were printed separately and glued in after the fact.

At this point I had the idea to incorporate the obligatory hand drawn Pokémon inside the case and add a little Mr.Garrison with a Santa hat to make it more festive.
This opened a can of worms because having positive and negative geometry on both sides of a print isn’t ideal. Material can’t be suspended in midair so in these cases you would have to print a removable structure to support the material which leaves marks on the print. Essentially whichever side is facing down will be rough. The solution was to print both sides separately and join them together after the fact.


This idea resulted in the cover going from 5 prints to 17 prints, but I think it was worth it. I like how the front of the case looks super serious but then you open it to see a derpy Mr.Garrison and my terrible drawing ![]() .
.
Oh yea, remember those hinges that I said were easy to design? As this project evolved so did the geometry of the case. If I had to guess I probably redesigned those stupid hinges about 10 times throughout the process to accommodate the changes. Should’ve saved those for last…
If you made it this far thanks for reading ![]()
24 Likes
Wow, this process looks incredible! Thanks for sharing it and it gives a lot of info to someone like me who is not at all familiar in these aspects, specially since on the SS thread you cannot showcase how much of work actually went in the case.
Cheers!
5 Likes
That is an incredible journey from nothing to something great! I really enjoyed seeing the process, you diligence and attention to the detail. You definitely have talent despite your claim. The concept itself is very cool. Awesome job
4 Likes
Woah, this is super awesome! It was great fun reading through the process of making it
4 Likes
Awesome to see what goes into your craft and how it had to be reworked so many times. I fear for when i get into 3d printing.
4 Likes

Looks incredible!
6 Likes
@mrbubbles @niece @Paper @jaxlax21 thank you for the kind words! ![]()
5 Likes
Thanks! I will say if your interested in 3d printing now is great time to get into it! The machines that have been released in the last couple of years are much more refined, faster, and user friendly than the previous gen machines which makes learning much easier!
3 Likes